AWS AmplifyでTodoアプリを作るハンズオンをやってみました
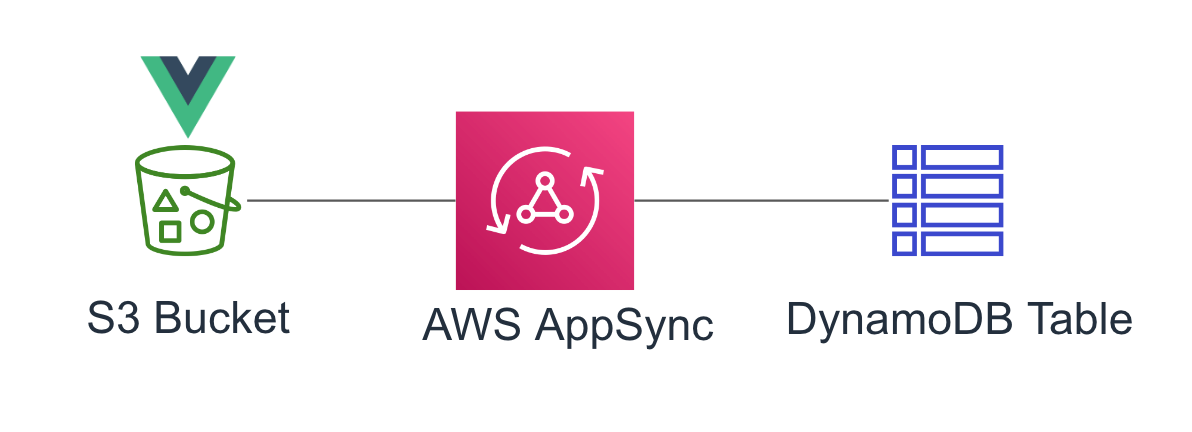
【お手軽ハンズオンで AWS を学ぶ】AWS Amplify で Todo アプリを作ろう! AWS AppSync & Amazon DynamoDB によるリアルタイムメッセージングを見ながら、AWS Amplify、AppSyncに触れてみました。
目次
ハンズオン環境
開発環境はCloud9を使用しました。
Cloud9はインスタンスタイプをt3.nanoにしただけで他はデフォルトです。
まずnodeとnpmのバージョン確認です。
|
1 2 3 4 5 |
$ node -v v10.20.1 $ npm -v 6.14.4 |
手順よりも上位バージョンなんでこのまま進めます。
インストールなどセットアップ
|
1 2 3 4 5 |
$ npm install -g @aws-amplify/cli@1.8.0 ~省略~ + @aws-amplify/cli@1.8.0 added 1895 packages from 1438 contributors in 43.798s |
|
1 2 3 4 5 6 7 |
$ amplify configure Follow these steps to set up access to your AWS account: Sign in to your AWS administrator account: https://console.aws.amazon.com/ Press Enter to continue |
マネジメントコンソールへのログインが促されましたが、Cloud9なんですでにログイン済です。
このまま[Enter]キーを押下しました。
|
1 2 3 4 5 |
Specify the AWS Region ? region: us-east-1 Specify the username of the new IAM user: ? user name: amplify-xxxxx |
リージョンはバージニア北部、IAMユーザーはデフォルトのユーザーです。
その下のリンクをクリックすると、マネジメントコンソールのIAMユーザー作成画面です。
IAMユーザーにAWS管理ポリシーのAdministratorAccessを設定しました。
プログラムによるアクセスが設定されているので、アクセスキーIDとシークレットアクセスキーが発行されました。
|
1 2 3 4 5 6 |
Enter the access key of the newly created user: ? accessKeyId: **************** ? secretAccessKey: ***************************** This would update/create the AWS Profile in your local machine ? Profile Name: amplify-handson |
amplify configureの続きでアクセスキーIDとシークレットアクセスキー、Profile Nameを設定しました。
ちょっと怖いので、Cloud9からのみ許可するように、ユーザーに以下のインラインポリシーを追加しました。
Cloud9のEC2にElasticIPアドレスを関連付けて、そこから以外はすべての操作を拒否するポリシーを追加しています。
|
1 2 3 4 5 6 7 8 9 10 11 12 13 14 15 16 17 18 |
{ "Version": "2012-10-17", "Statement": [ { "Effect": "Deny", "Action": "*", "Resource": "*", "Condition": { "NotIpAddress": { "aws:SourceIp": [ "55.66.77.88/32" ] } } } ] } |
手順どおりにvueをインストールして、
|
1 2 |
$ npm install -g @vue/cli |
vueのプロジェクトを新規作成して、
|
1 2 |
$ vue create myamplifyproject |
プロジェクトディレクトリに移動しました。
|
1 2 |
$ cd myamplifyproject |
|
1 2 |
$ npm i @aws-amplify/api @aws-amplify/pubsub |
AWS Amplify のAPI機能とメッセージング機能のモジュールをインストールしました。
|
1 2 3 4 5 6 7 8 9 10 11 12 13 14 |
$ npm run serve > myamplifyproject@0.1.0 serve /home/ec2-user/environment/myamplifyproject > vue-cli-service serve INFO Starting development server... 98% after emitting CopyPlugin DONE Compiled successfully in 3262ms App running at: - Local: http://localhost:8080/ - Network: http://172.31.0.191:8080/ |
私の環境はCloud9ですので、ブラウザからアプリにアクセスしました。
セキュリティグループでは8080ポートに対してのインバウンドルールを追加しました。
http://ElasticIPのアドレス:8080
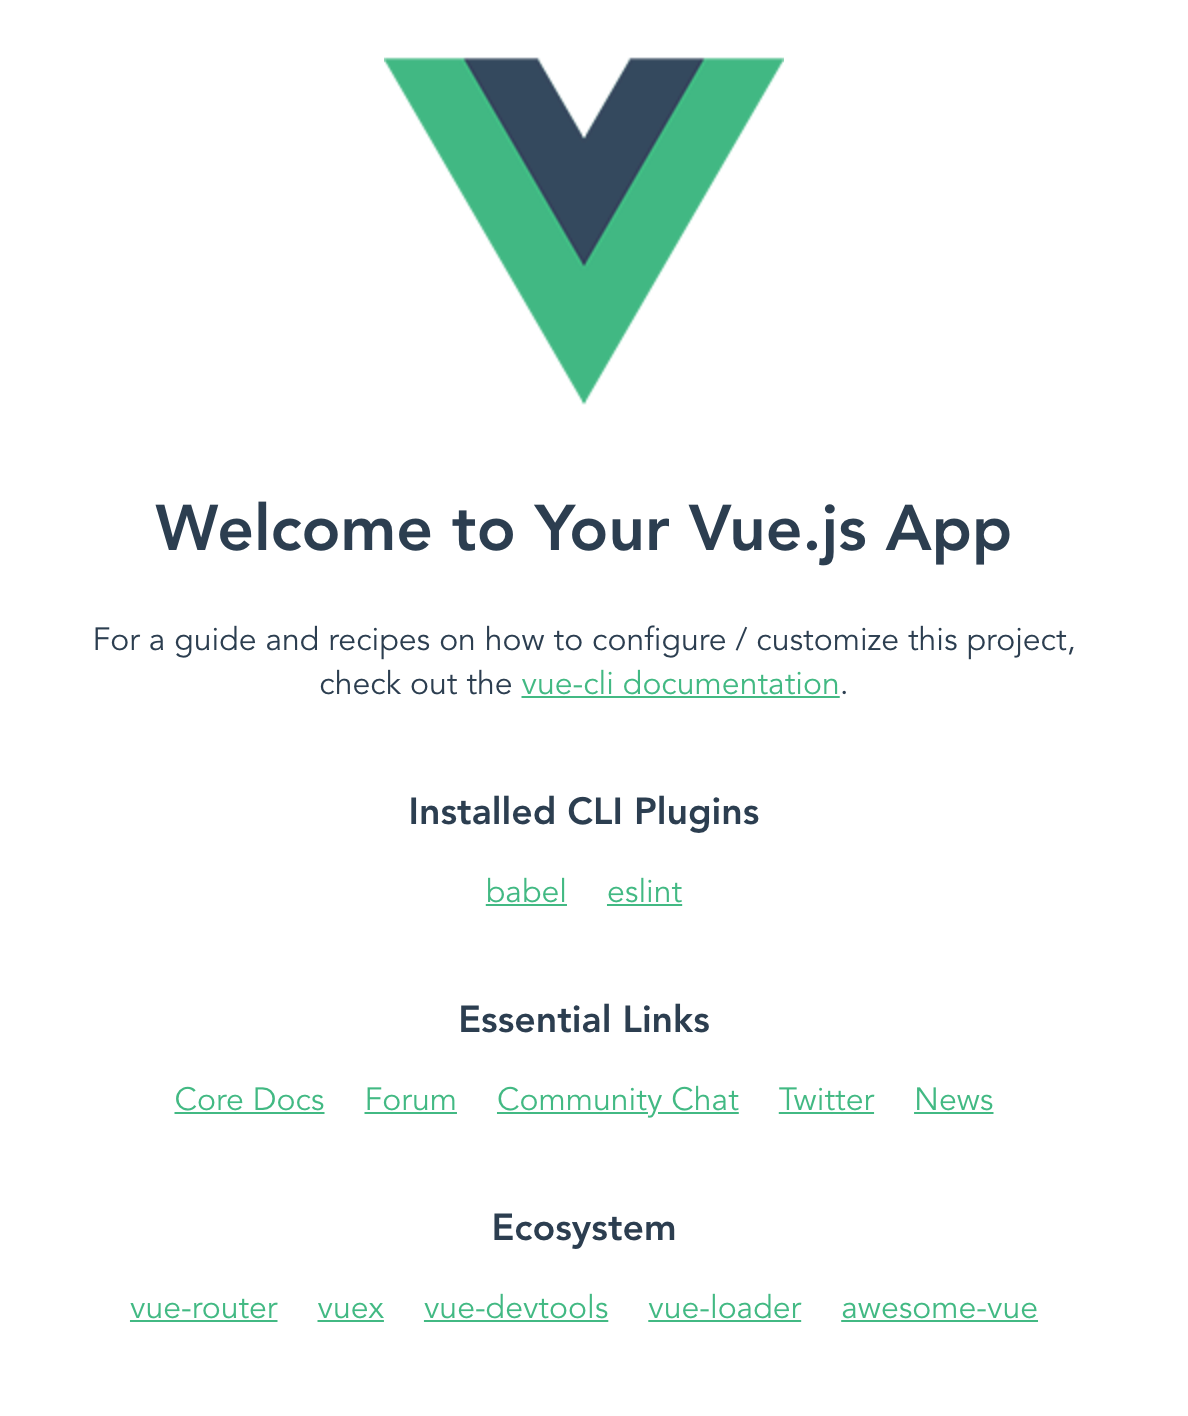
画面が表示されました。
ハンズオン手順では、Cloud9の場合はプロジェクトのルートディレクトリにvue.config.js を以下の内容で追加しましょうとありましたが、なくても表示されました。
ですが、後の手順でうまくいかなくなってもと思い、念のために追加して、npm run serve を再実行しました。
|
1 2 3 4 5 6 |
module.exports = { devServer: { disableHostCheck: true } } |
サーバーレスバックエンドリソースの作成
amplify init を実行しました。
選択、入力したのは、環境名の「test」と、エディタのVimだけで、あとはデフォルトです。
|
1 2 3 4 5 6 7 8 9 10 11 12 13 14 15 16 17 18 19 20 21 22 23 24 25 26 27 28 29 30 31 32 33 34 35 36 37 38 39 40 41 |
$ amplify init Note: It is recommended to run this command from the root of your app directory ? Enter a name for the project myamplifyproject ? Enter a name for the environment test ? Choose your default editor: Vim (via Terminal, Mac OS only) ? Choose the type of app that you're building javascript Please tell us about your project ? What javascript framework are you using vue ? Source Directory Path: src ? Distribution Directory Path: dist ? Build Command: npm run-script build ? Start Command: npm run-script serve Using default provider awscloudformation For more information on AWS Profiles, see: https://docs.aws.amazon.com/cli/latest/userguide/cli-multiple-profiles.html ? Do you want to use an AWS profile? Yes ? Please choose the profile you want to use amplify-handson ⠧ Initializing project in the cloud... CREATE_IN_PROGRESS myamplifyproject-test-20200628070207 AWS::CloudFormation::Stack Sun Jun 28 2020 07:02:08 GMT+0000 (Coordinated Universal Time) User Initiated ⠏ Initializing project in the cloud... ~中略~ ✔ Successfully created initial AWS cloud resources for deployments. ✔ Initialized provider successfully. Initialized your environment successfully. Your project has been successfully initialized and connected to the cloud! Some next steps: "amplify status" will show you what you've added already and if it's locally configured or deployed "amplify <category> add" will allow you to add features like user login or a backend API "amplify push" will build all your local backend resources and provision it in the cloud "amplify publish" will build all your local backend and frontend resources (if you have hosting category added) and provision it in the cloud Pro tip: Try "amplify add api" to create a backend API and then "amplify publish" to deploy everything |
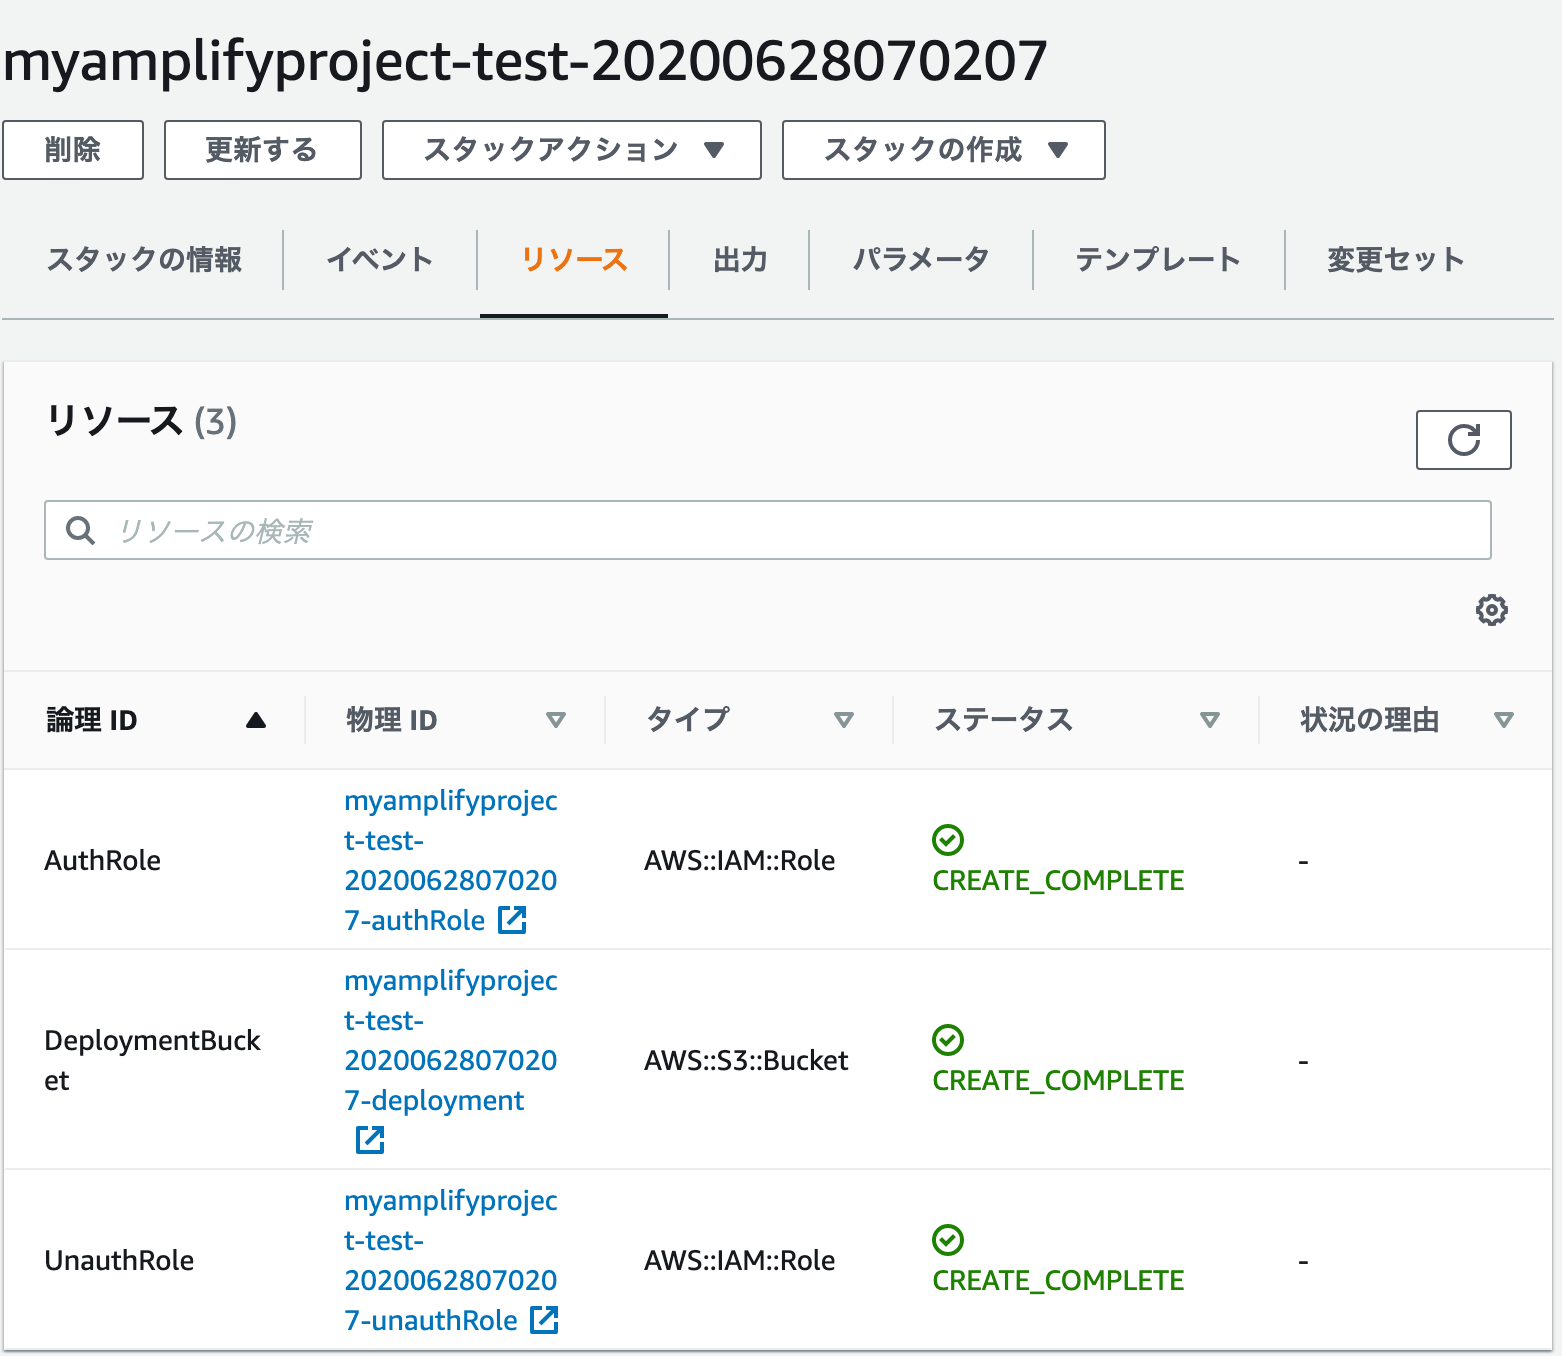
IAMロール2つとS3バケット1つがCloudFormationスタックによって作成されました。
この段階で、amplify statusコマンドを実行して何も値が表示されなければ正常とのことです。
|
1 2 3 4 5 6 7 |
$ amplify status Current Environment: test | Category | Resource name | Operation | Provider plugin | | -------- | ------------- | --------- | --------------- | |
amplify add api コマンドでアプリケーションにAPI機能を追加します。
|
1 2 3 4 5 6 7 8 9 10 11 12 13 14 15 16 17 18 19 20 |
$ amplify add api ? Please select from one of the below mentioned services GraphQL ? Provide API name: myamplifyproject ? Choose an authorization type for the API API key ? Do you have an annotated GraphQL schema? No ? Do you want a guided schema creation? Yes ? What best describes your project: Single object with fields (e.g., “Todo” with ID, name, description) ? Do you want to edit the schema now? Yes Selected default editor not found in your machine. Please manually edit the file created at /home/ec2-user/environment/myamplifyproject/amplify/backend/api/myamplifyproject/schema.graphql ? Press enter to continue GraphQL schema compiled successfully. Edit your schema at /home/ec2-user/environment/myamplifyproject/amplify/backend/api/myamplifyproject/schema.graphql or place .graphql files in a directory at /home/ec2-user/environment/myamplifyproject/amplify/backend/api/myamplifyproject/schema Successfully added resource myamplifyproject locally Some next steps: "amplify push" will build all your local backend resources and provision it in the cloud "amplify publish" will build all your local backend and frontend resources (if you have hosting category added) and provision it in the cloud |
“Selected default editor not found in your machine. Please manually edit the file created at /home/ec2-user/environment/myamplifyproject/amplify/backend/api/myamplifyproject/schema.graphql”と出力されたので、vimコマンドで該当のファイルにアクセスしてみました。
|
1 2 3 4 5 6 |
type Todo @model { id: ID! name: String! description: String } |
手順の結果どおり作成されているので、特に編集はせずにこのまま進めました。
|
1 2 3 4 5 6 7 8 |
$ amplify status Current Environment: test | Category | Resource name | Operation | Provider plugin | | -------- | ---------------- | --------- | ----------------- | | Api | myamplifyproject | Create | awscloudformation | |
amplify status コマンドを実行すると、APIが追加されていました。
バックエンドリソースに反映するために amplify push コマンドを実行しました。
|
1 2 3 4 5 6 7 8 9 10 11 12 13 14 15 16 17 18 19 20 21 22 23 24 |
$ amplify push Current Environment: test | Category | Resource name | Operation | Provider plugin | | -------- | ---------------- | --------- | ----------------- | | Api | myamplifyproject | Create | awscloudformation | ? Are you sure you want to continue? Yes GraphQL schema compiled successfully. Edit your schema at /home/ec2-user/environment/myamplifyproject/amplify/backend/api/myamplifyproject/schema.graphql or place .graphql files in a directory at /home/ec2-user/environment/myamplifyproject/amplify/backend/api/myamplifyproject/schema ? Do you want to generate code for your newly created GraphQL API Yes ? Choose the code generation language target javascript ? Enter the file name pattern of graphql queries, mutations and subscriptions src/graphql/**/*.js ? Do you want to generate/update all possible GraphQL operations - queries, mutations and subscriptions Yes ? Enter maximum statement depth [increase from default if your schema is deeply nested] 2 ⠋ Updating resources in the cloud. This may take a few minutes... UPDATE_IN_PROGRESS myamplifyproject-test-20200628070207 AWS::CloudFormation::Stack Sun Jun 28 2020 07:22:10 GMT+0000 (Coordinated Universal Time) User Initiated ⠹ Updating resources in the cloud. This may take a few minutes... ~後略~ |
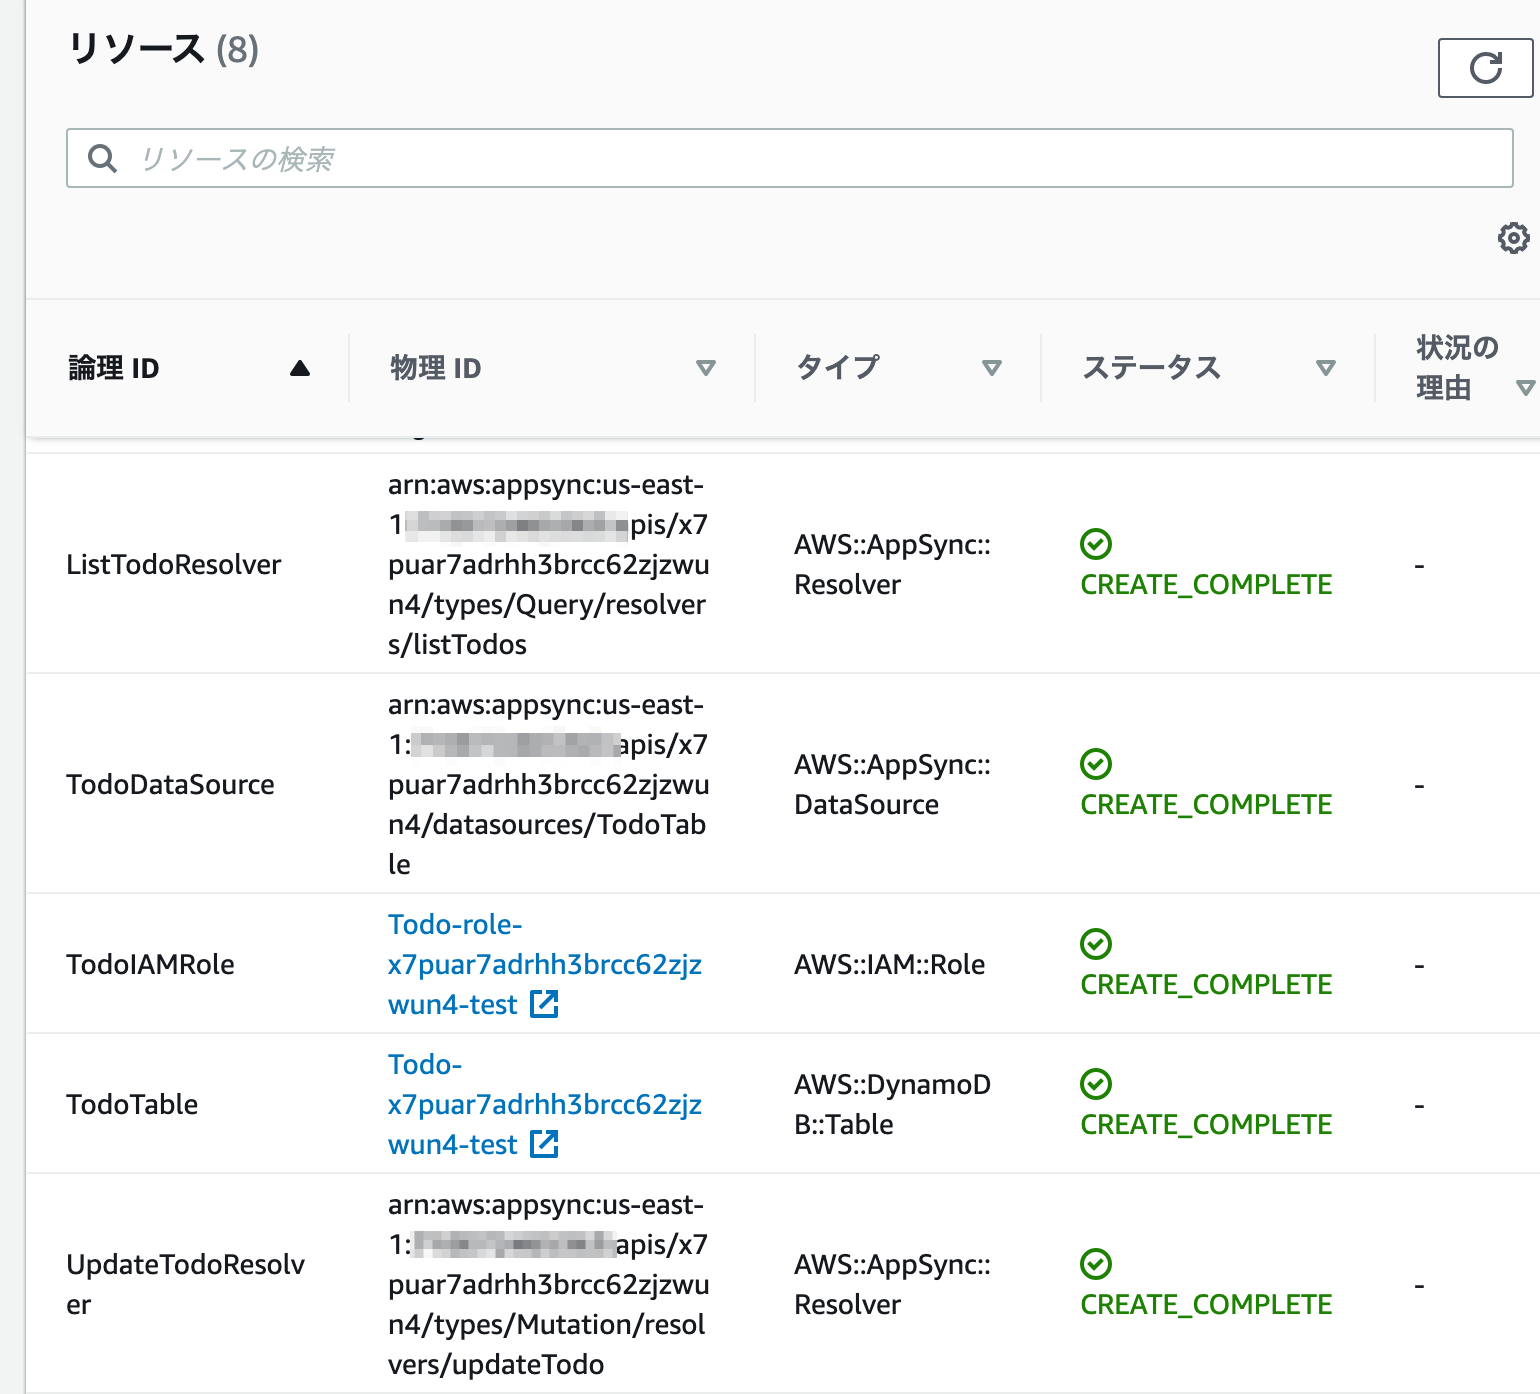
CloudFormation スタックが更新されて、API機能に必要な、DynamoDBテーブルや、AppSyncリソースが作成されました。
アプリケーションからAWS Amplifyを使ってバックエンドにアクセス
Todo追加ボタン
src/main.js に手順に沿って以下を追加しました。
|
1 2 3 4 5 6 7 |
import API from '@aws-amplify/api'; import PubSub from '@aws-amplify/pubsub'; import awsconfig from './aws-exports'; API.configure(awsconfig); PubSub.configure(awsconfig); |
API機能とメッセージング機能のモジュールをインポートしてawsconfigureで設定しているコードに見えます。
src/App.vueも手順に沿って以下に置換しました。
|
1 2 3 4 5 6 7 8 9 10 11 12 13 14 15 16 17 18 19 20 21 22 23 24 25 26 27 28 29 30 31 32 33 |
<template> <div id="app"> <button @click="createNewTodo">Add Todo</button> </div> </template> <script> import API, { graphqlOperation } from '@aws-amplify/api'; // eslint-disable-next-line import { createTodo } from "./graphql/mutations"; /* Supported log levels for browser debugging: ERROR WARN INFO DEBUG VERBOSE @see https://aws-amplify.github.io/docs/js/logger */ window.LOG_LEVEL = 'VERBOSE'; export default { name: 'app', methods: { async createNewTodo() { const todo = { name: "Todo Title", description: "あれをやる" + Date() } await API.graphql(graphqlOperation(createTodo, { input: todo })) } } }; </script> |
Add Todoボタンを押下すると、{ name: “Todo Title”, description: “あれをやる” + Date() }が、graphqlOperationのcreateTodoによって、DynamoDBテーブルに書き込まれるのですね。
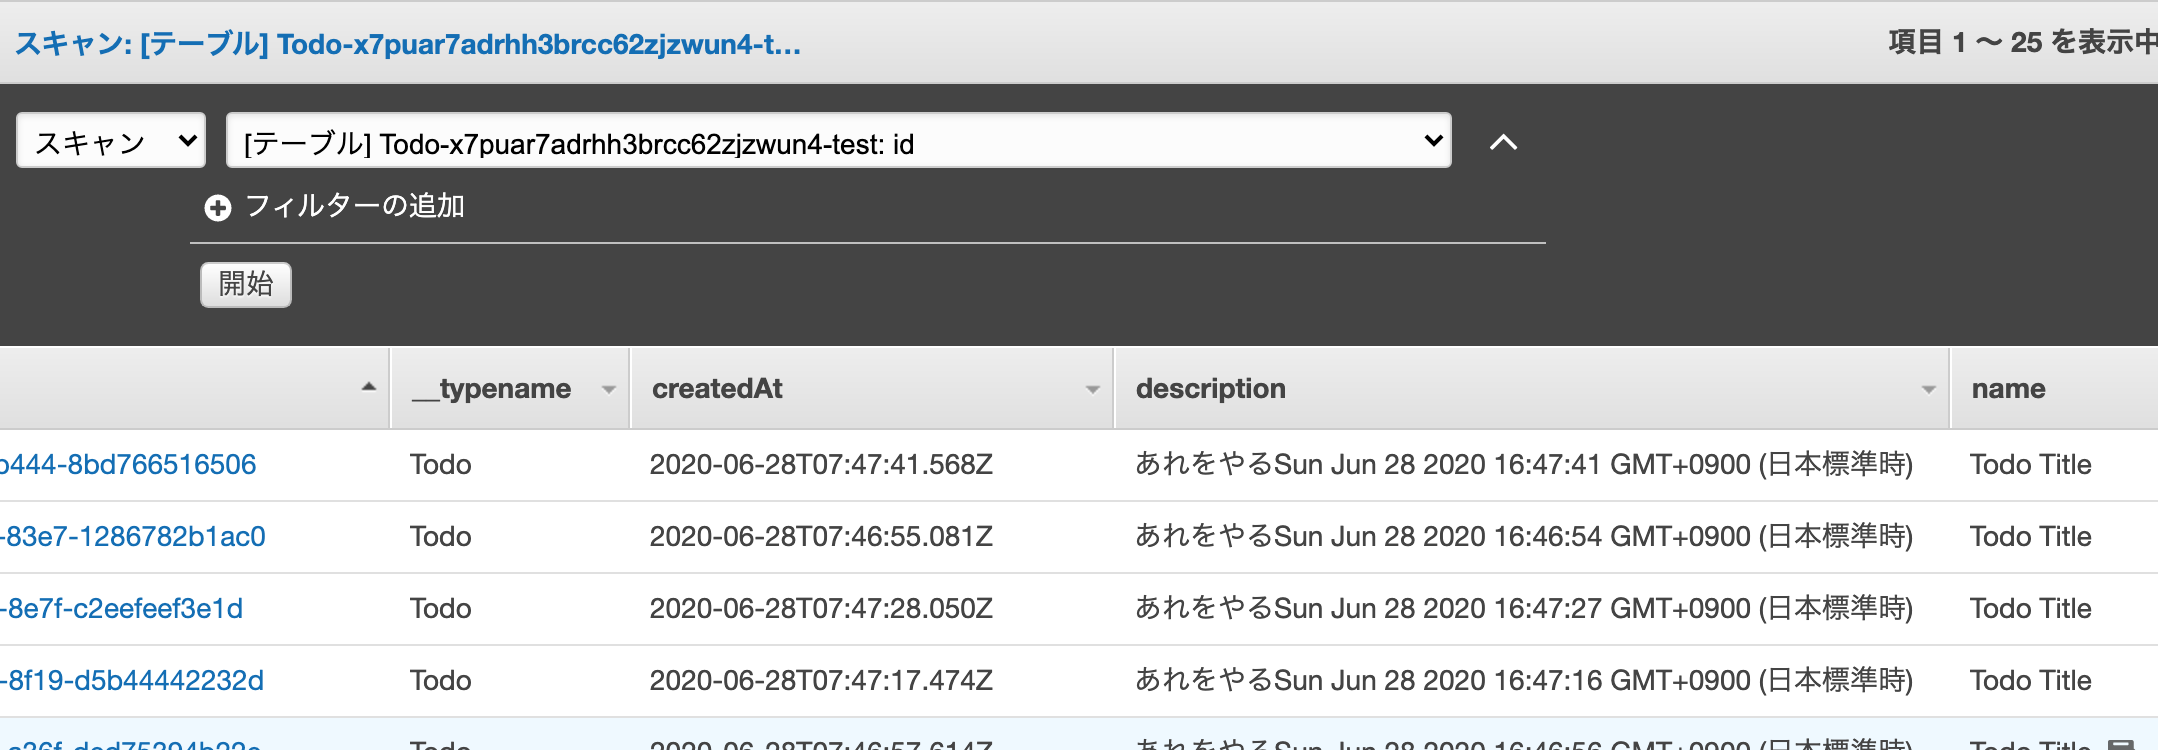
やってみるとDynamoDBテーブルに新規データが登録されていました。
|
1 2 |
$ npm run serve |
npm run serve コマンドを実行してブラウザから確認してみます。
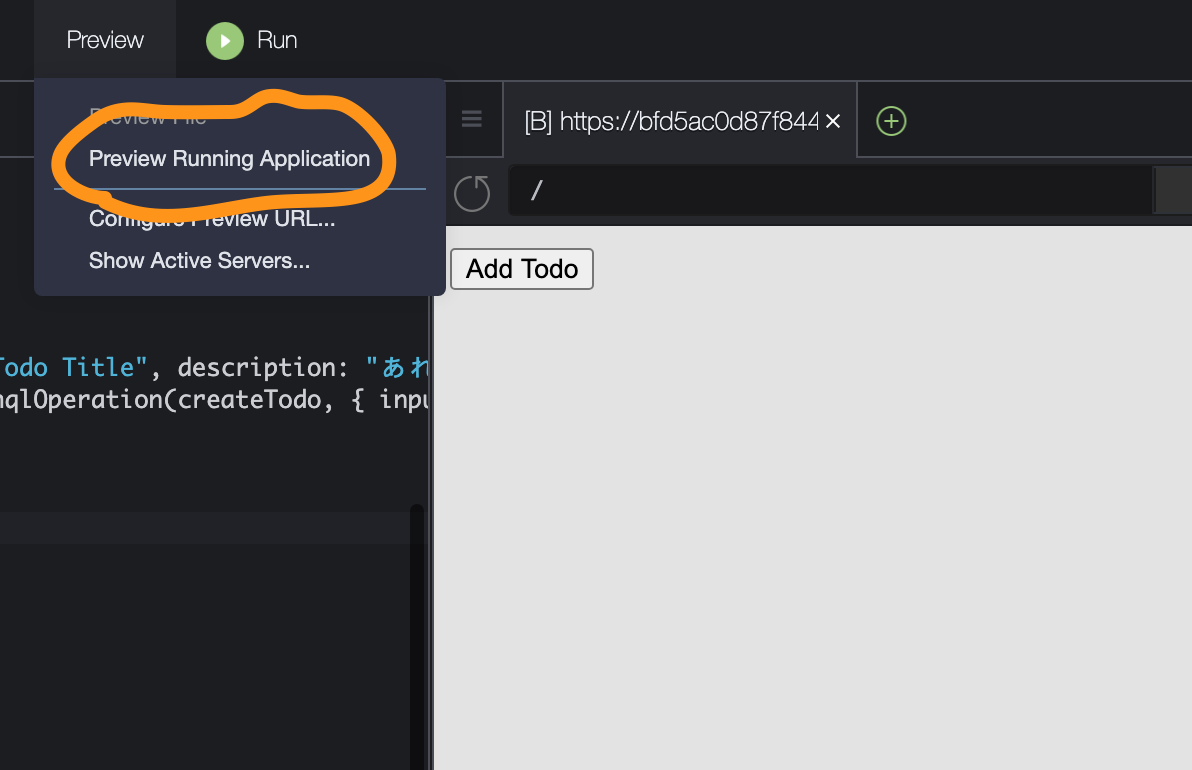
Add Todoボタンが表示されました。
順調なようです。
このあたりで気づいたのですが、Cloud9の[Preview] – [Preview Running Application]でプレビュー見れるのですね。
とりあえず、[Ctrl]-[C]でアプリケーションを終了して、ハンズオンを進めます。
Todoの一覧表示
次はDynamoDBに登録されているアイテムを画面に表示します。
src/App.vueを編集しました。
|
1 2 3 4 5 6 7 8 9 10 11 12 13 14 15 16 17 18 19 20 21 22 23 24 25 26 27 28 29 30 31 32 33 34 35 36 37 38 39 40 41 42 |
<template> <div id="app"> <button @click="createNewTodo">Add Todo</button> <ul> <li v-for="todo in todos" :key="todo.id"> {{todo.name}} - {{todo.description}} </li> </ul> </div> </template> <script> import API, { graphqlOperation } from '@aws-amplify/api'; // eslint-disable-next-line import { createTodo } from "./graphql/mutations"; import { listTodos } from './graphql/queries' window.LOG_LEVEL = 'VERBOSE'; export default { name: 'app', data(){ return { todos: [] } }, methods: { async createNewTodo() { const todo = { name: "Todo Title", description: "あれをやる" + Date() } await API.graphql(graphqlOperation(createTodo, { input: todo })) }, async getData(){ const todoData = await API.graphql(graphqlOperation(listTodos)) this.todos.push(...this.todos, ...todoData.data.listTodos.items); } }, created(){ this.getData() } }; </script> |
追加したのが、こちら。
|
1 2 3 4 5 6 |
<ul> <li v-for="todo in todos" :key="todo.id"> {{todo.name}} - {{todo.description}} </li> </ul> |
|
1 2 |
import { listTodos } from './graphql/queries' |
|
1 2 3 4 5 6 7 8 9 |
async getData(){ const todoData = await API.graphql(graphqlOperation(listTodos)) this.todos.push(...this.todos, ...todoData.data.listTodos.items); } }, created(){ this.getData() } |
graphqlOperationのlistTodosで、取得したアイテムを
<
ul>タグのとこに一覧表示しているようです。
表示されました。
一覧表示のリアルタイム更新
次は新しいアイテムが投稿されたときに、自動的に一覧に表示させる機能の追加です。
わかりやすくするために、一度DynamoDBのアイテムを削除しました。
src/App.vueを編集しました。
|
1 2 3 4 5 6 7 8 9 10 11 12 13 14 15 16 17 18 19 20 21 22 23 24 25 26 27 28 29 30 31 32 33 34 35 36 37 38 39 40 41 42 43 44 45 46 47 48 49 50 51 52 |
<template> <div id="app"> <button @click="createNewTodo">Add Todo</button> <ul> <li v-for="todo in todos" :key="todo.id"> {{todo.name}} - {{todo.description}} </li> </ul> </div> </template> <script> import API, { graphqlOperation } from '@aws-amplify/api'; // eslint-disable-next-line import { createTodo } from "./graphql/mutations"; import { listTodos } from './graphql/queries'; import { onCreateTodo } from './graphql/subscriptions'; window.LOG_LEVEL = 'VERBOSE'; export default { name: 'app', data(){ return { todos: [] } }, methods: { async createNewTodo() { const todo = { name: "Todo Title", description: "あれをやる" + Date() } await API.graphql(graphqlOperation(createTodo, { input: todo })) }, async getData(){ const todoData = await API.graphql(graphqlOperation(listTodos)) this.todos.push(...this.todos, ...todoData.data.listTodos.items); }, subscribe(){ API.graphql(graphqlOperation(onCreateTodo)).subscribe({ next: (eventData) => { const todo = eventData.value.data.onCreateTodo; this.todos.push(todo); } }) } }, created(){ this.getData() this.subscribe() } }; </script> |
追加したのがこちらです。
|
1 2 |
import { onCreateTodo } from './graphql/subscriptions'; |
|
1 2 3 4 5 6 7 8 9 |
subscribe(){ API.graphql(graphqlOperation(onCreateTodo)).subscribe({ next: (eventData) => { const todo = eventData.value.data.onCreateTodo; this.todos.push(todo); } }) } |
|
1 2 |
this.subscribe() |
|
1 2 |
$ npm run serve |
npm run serve して手順にあるとおり、ブラウザ2つでテストしました。
できました!
アプリケーションのリリース
リリースすると、S3で静的なWebサイトとして公開できるとのことです。
いたれりつくせりですね。
|
1 2 3 4 5 6 7 8 9 |
$ amplify add hosting ? Select the environment setup: DEV (S3 only with HTTP) ? hosting bucket name myamplifyproject-20200628080745-hostingbucket ? index doc for the website index.html ? error doc for the website index.html You can now publish your app using the following command: Command: amplify publish |
今回はDEVのS3のみとしてますが、PRODにするとCloudFrontが使えるみたいです。
いたれりつくせりですね。
|
1 2 3 4 5 6 7 8 9 |
$ amplify status Current Environment: test | Category | Resource name | Operation | Provider plugin | | -------- | ---------------- | --------- | ----------------- | | Hosting | S3AndCloudFront | Create | awscloudformation | | Api | myamplifyproject | No Change | awscloudformation | |
amplify status コマンドで確認すると、Hosting が追加されています。
|
1 2 3 4 5 6 7 8 9 10 11 12 13 14 15 16 17 18 19 20 21 22 23 24 25 26 27 28 29 30 31 32 33 34 35 36 37 38 39 40 41 42 43 44 45 46 47 48 49 50 51 52 53 54 55 56 57 58 59 60 61 62 63 64 65 66 |
$ amplify publish Current Environment: test | Category | Resource name | Operation | Provider plugin | | -------- | ---------------- | --------- | ----------------- | | Hosting | S3AndCloudFront | Create | awscloudformation | | Api | myamplifyproject | No Change | awscloudformation | ? Are you sure you want to continue? Yes ⠇ Updating resources in the cloud. This may take a few minutes... UPDATE_IN_PROGRESS myamplifyproject-test-20200628070207 AWS::CloudFormation::Stack Sun Jun 28 2020 08:10:55 GMT+0000 (Coordinated Universal Time) User Initiated ⠋ Updating resources in the cloud. This may take a few minutes... ~中略~ ✔ All resources are updated in the cloud Hosting endpoint: http://myamplifyproject-20200628080745-hostingbucket-test.s3-website-us-east-1.amazonaws.com > myamplifyproject@0.1.0 build /home/ec2-user/environment/myamplifyproject > vue-cli-service build ⠹ Building for production... WARNING Compiled with 3 warnings 8:14:57 AM warning asset size limit: The following asset(s) exceed the recommended size limit (244 KiB). This can impact web performance. Assets: js/chunk-vendors.82a4b24a.js (506 KiB) warning entrypoint size limit: The following entrypoint(s) combined asset size exceeds the recommended limit (244 KiB). This can impact web performance. Entrypoints: app (510 KiB) js/chunk-vendors.82a4b24a.js js/app.39380e66.js warning webpack performance recommendations: You can limit the size of your bundles by using import() or require.ensure to lazy load some parts of your application. For more info visit https://webpack.js.org/guides/code-splitting/ File Size Gzipped dist/js/chunk-vendors.82a4b24a.js 506.22 KiB 146.54 KiB dist/js/app.39380e66.js 4.19 KiB 1.89 KiB Images and other types of assets omitted. DONE Build complete. The dist directory is ready to be deployed. INFO Check out deployment instructions at https://cli.vuejs.org/guide/deployment.html frontend build command exited with code 0 ✔ Uploaded files successfully. Your app is published successfully. http://myamplifyproject-20200628080745-hostingbucket-test.s3-website-us-east-1.amazonaws.com |
完了しました。
最終行に出力されたS3の静的Webサイトエンドポイントでアプリケーションにアクセスできました。
AppSyncにはこちらのスキーマが作成されていました。
|
1 2 3 4 5 6 7 8 9 10 11 12 13 14 15 16 17 18 19 20 21 22 23 24 25 26 27 28 29 30 31 32 33 34 35 36 37 38 39 40 41 42 43 44 45 46 47 48 49 50 51 52 53 54 55 56 57 58 59 60 61 62 63 64 65 66 67 68 69 70 71 72 73 74 75 76 77 78 79 80 81 82 83 84 85 86 87 88 89 90 91 92 93 94 95 96 97 98 99 100 101 102 103 104 105 106 107 108 109 110 111 112 113 114 115 116 |
input CreateTodoInput { id: ID name: String! description: String } input DeleteTodoInput { id: ID } input ModelBooleanFilterInput { ne: Boolean eq: Boolean } input ModelFloatFilterInput { ne: Float eq: Float le: Float lt: Float ge: Float gt: Float contains: Float notContains: Float between: [Float] } input ModelIDFilterInput { ne: ID eq: ID le: ID lt: ID ge: ID gt: ID contains: ID notContains: ID between: [ID] beginsWith: ID } input ModelIntFilterInput { ne: Int eq: Int le: Int lt: Int ge: Int gt: Int contains: Int notContains: Int between: [Int] } enum ModelSortDirection { ASC DESC } input ModelStringFilterInput { ne: String eq: String le: String lt: String ge: String gt: String contains: String notContains: String between: [String] beginsWith: String } type ModelTodoConnection { items: [Todo] nextToken: String } input ModelTodoFilterInput { id: ModelIDFilterInput name: ModelStringFilterInput description: ModelStringFilterInput and: [ModelTodoFilterInput] or: [ModelTodoFilterInput] not: ModelTodoFilterInput } type Mutation { createTodo(input: CreateTodoInput!): Todo updateTodo(input: UpdateTodoInput!): Todo deleteTodo(input: DeleteTodoInput!): Todo } type Query { getTodo(id: ID!): Todo listTodos(filter: ModelTodoFilterInput, limit: Int, nextToken: String): ModelTodoConnection } type Subscription { onCreateTodo: Todo @aws_subscribe(mutations: ["createTodo"]) onUpdateTodo: Todo @aws_subscribe(mutations: ["updateTodo"]) onDeleteTodo: Todo @aws_subscribe(mutations: ["deleteTodo"]) } type Todo { id: ID! name: String! description: String } input UpdateTodoInput { id: ID! name: String description: String } |
リソース削除
|
1 2 3 4 5 6 7 |
$ amplify delete ? Are you sure you want to continue?(This would delete all the environments of the project from the cloud and wipe out all the local amplify resource files) Yes Deleting env:test ✔ Project deleted in the cloud Project deleted locally. |
amplify deleteコマンドを実行して、CloudFormationスタックを削除します。
S3バケットはDELETE_SKIPPEDされてたので手動で削除しました。
最後にハンズオン環境として使ったCloud9を削除して終了です。
まとめ
AWS Amplifyを使うことで、AppSync、DynamoDB、S3バケットなど必要なリソースの作成と設定をCloudFormationスタックでまとめてやってくれました。
これで、開発者はフロントエンドの開発により注力することができますね。
最後までお読みいただきましてありがとうございました!
「AWS認定資格試験テキスト&問題集 AWS認定ソリューションアーキテクト - プロフェッショナル 改訂第2版」という本を書きました。
「AWS認定資格試験テキスト AWS認定クラウドプラクティショナー 改訂第3版」という本を書きました。
「ポケットスタディ AWS認定 デベロッパーアソシエイト [DVA-C02対応] 」という本を書きました。

「要点整理から攻略するAWS認定ソリューションアーキテクト-アソシエイト」という本を書きました。
「AWSではじめるLinux入門ガイド」という本を書きました。
開発ベンダー5年、ユーザ企業システム部門通算9年、ITインストラクター5年目でプロトタイプビルダーもやりだしたSoftware Engineerです。
質問はコメントかSNSなどからお気軽にどうぞ。
出来る限りなるべく答えます。
このブログの内容/発言の一切は個人の見解であり、所属する組織とは関係ありません。
このブログは経験したことなどの共有を目的としており、手順や結果などを保証するものではありません。
ご参考にされる際は、読者様自身のご判断にてご対応をお願いいたします。
また、勉強会やイベントのレポートは自分が気になったことをメモしたり、聞いて思ったことを書いていますので、登壇者の意見や発表内容ではありません。
ad
ad
関連記事
-

-
VyOSでssm-userからvyosユーザーに切り替える
EC2 VyOSで/etc/resolv.confを設定しました VyOSにSS …
-

-
特定AWSアカウント特定リージョンのSQSキューを削除するLambda(Python)
やりたいこと 特定アカウント内特定リージョン内のSQSキューを全部削除したいです …
-

-
特定AWSアカウント特定リージョンのSNSトピックを削除するLambda(Python)
やりたいこと 特定アカウント内特定リージョン内のSNSトピックを全部削除したいで …
-

-
Amazon SESの受信ルールでSNSトピックを追加
SESの受信ルールにSNSトピックを設定してみました。 [View Active …
-

-
ブラウザからJavaScript SDKを使ってAmazon S3 への写真のアップロードチュートリアルをやってみました
ブラウザから Amazon S3 への写真のアップロードをやってみました。 HT …
-

-
「CMC_Central 2024」に参加しました
個人サポーターとしてCMC_Central 2024に参加しました。 オープニン …
-

-
Active Directory認証でAWSマネジメントコンソールにSSO
こちらの2つのサイトを参考にすすめました。 Active Directory資産 …
-

-
GoogleForm,GASからAPI Gateway, Lambdaで入力情報をDynamoDBに格納する
vol.26 AWS認定試験テキスト認定クラウドプラクティショナーのデモ(Dyn …
-

-
Backlogの実績工数をAmazon QuickSightでの可視化 – 仕組み編
Backlogの実績工数をAmazon QuickSightで可視化してわかった …
-

-
AWS CodeCommit 認証情報ヘルパーをmacOSに設定しました
AWS CLI 認証情報ヘルパーを使用して Linux, macOS, or U …

