
「AWSの基礎を学ぼう 特別編 最新サービスをみんなで触ってみる Amplify + Admin UI」に参加しました。
亀田さんが定期開催というか、高頻度開催されている「AWSの基礎を学ぼう 特別編 最新サービスをみんなで触ってみる Amplify + Admin UI」に参加しました。
「2020年12月にアナウンスされた、アプリケーションバックエンドを構成し、AWSコンソールの外部でアプリユーザーとコンテンツを管理するための新しいAWS Amplifyの管理UIである、Amplify Admin UIをみんなで触りましょう」というハンズオンです。
手順はこちらです。
AWS-Amplify-Admin-UI
目次
ハンズオン環境構築
Cloud9で環境を作成しました。
私はバージニア北部でやりました。
Cloud9のEC2インスタンスにアタッチされているEBSボリュームは10GBなので、このあとのハンズオンのために、30GBにリサイズします。
resize.shを用意いただいてました。
中身はAWS CLIでボリュームのサイズ変更して、変更完了したら、growpartコマンドなどなどを実行して、Linuxで使えるようにすると。
次にCloud9デフォルトの認証情報を削除します。
aws configure listで見るとこうなっていました。
Cloud9構築時に.aws/credentialsができてるんですね。
|
1 2 3 4 5 6 7 8 |
$ aws configure list Name Value Type Location ---- ----- ---- -------- profile <not set> None None access_key ****************3PEE shared-credentials-file secret_key ****************IT7d shared-credentials-file region us-east-1 config-file ~/.aws/config |
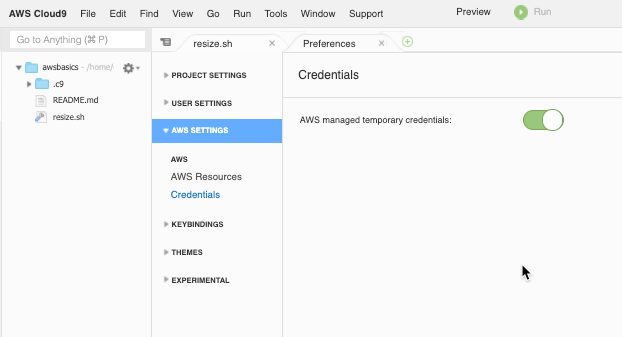
Cloud9のAWS SettingsでAWS managed temporary credentialsをオフにしました。
|
1 2 3 4 5 6 7 8 |
$ aws configure list Name Value Type Location ---- ----- ---- -------- profile <not set> None None access_key <not set> None None secret_key <not set> None None region <not set> None None |
全部設定がなくなるのですね。
ふむふむ。
|
1 2 |
$ cat ~/.aws/credentials |
で確認すると、AWS managed temporary credentialsをオンにすると、.aws/credentialsができて、オフにすると削除しているのですね。
なるへそなるへそ。
Amplify CLIのインストールと設定
|
1 2 3 4 5 6 7 8 9 10 11 12 13 14 15 16 17 18 19 20 21 22 23 24 25 26 27 28 29 |
$ cd /home/ec2-user $ npm install -g @aws-amplify/cli $ amplify configure Initializing new Amplify CLI version... Done initializing new version. Scanning for plugins... Plugin scan successful Follow these steps to set up access to your AWS account: Sign in to your AWS administrator account: https://console.aws.amazon.com/ Press Enter to continue Specify the AWS Region ? region: us-east-1 Specify the username of the new IAM user: ? user name: amplify-cli-user Complete the user creation using the AWS console https://console.aws.amazon.com/iam/home?region=us-east-1#/users$new?step=final&accessKey&userNames=amplify-cli-user&permissionType=policies&policies=arn:aws:iam::aws:policy%2FAdministratorAccess Press Enter to continue Enter the access key of the newly created user: ? accessKeyId: ******************** ? secretAccessKey: **************************************** This would update/create the AWS Profile in your local machine ? Profile Name: amplify-cli-user Successfully set up the new user. |
Amplifyのインストールとハンズオン用のIAMユーザー作成と設定をしました。
React Appを作成
次にReact Appを作成しました。
|
1 2 |
$ npx create-react-app react-amplified |
Happy hacking!と出力されたら完了です。
|
1 2 3 |
$ cd react-amplified $ npm start |
プロジェクトの作成
別のターミナルを開いて次のコマンド。
amplify initでプロジェクトを作成して、CloudFormationスタックができました。
|
1 2 3 4 5 6 7 8 9 10 11 12 13 14 15 16 17 18 19 20 21 22 23 24 25 26 27 28 29 30 31 32 33 34 35 36 37 38 39 40 41 42 43 44 45 46 47 48 49 50 51 52 53 54 55 56 57 58 59 60 61 62 |
$ cd /home/ec2-user/ $ cd react-amplified $ amplify init Note: It is recommended to run this command from the root of your app directory ? Enter a name for the project reactamplified The following configuration will be applied: Project information | Name: reactamplified | Environment: dev | Default editor: Visual Studio Code | App type: javascript | Javascript framework: react | Source Directory Path: src | Distribution Directory Path: build | Build Command: npm run-script build | Start Command: npm run-script start ? Initialize the project with the above configuration? Yes Using default provider awscloudformation ? Select the authentication method you want to use: AWS profile For more information on AWS Profiles, see: https://docs.aws.amazon.com/cli/latest/userguide/cli-configure-profiles.html ? Please choose the profile you want to use amplify-cli-user Adding backend environment dev to AWS Amplify Console app: d3a3r31eanpk5t ⠼ Initializing project in the cloud... CREATE_IN_PROGRESS amplify-reactamplified-dev-50248 AWS::CloudFormation::Stack Sat Apr 24 2021 05:02:50 GMT+0000 (Coordinated Universal Time) User Initiated CREATE_IN_PROGRESS AuthRole AWS::IAM::Role Sat Apr 24 2021 05:02:54 GMT+0000 (Coordinated Universal Time) CREATE_IN_PROGRESS DeploymentBucket AWS::S3::Bucket Sat Apr 24 2021 05:02:54 GMT+0000 (Coordinated Universal Time) CREATE_IN_PROGRESS UnauthRole AWS::IAM::Role Sat Apr 24 2021 05:02:54 GMT+0000 (Coordinated Universal Time) CREATE_IN_PROGRESS AuthRole AWS::IAM::Role Sat Apr 24 2021 05:02:54 GMT+0000 (Coordinated Universal Time) Resource creation Initiated CREATE_IN_PROGRESS DeploymentBucket AWS::S3::Bucket Sat Apr 24 2021 05:02:55 GMT+0000 (Coordinated Universal Time) Resource creation Initiated ⠧ Initializing project in the cloud... CREATE_IN_PROGRESS UnauthRole AWS::IAM::Role Sat Apr 24 2021 05:02:55 GMT+0000 (Coordinated Universal Time) Resource creation Initiated ⠙ Initializing project in the cloud... CREATE_COMPLETE AuthRole AWS::IAM::Role Sat Apr 24 2021 05:03:06 GMT+0000 (Coordinated Universal Time) CREATE_COMPLETE UnauthRole AWS::IAM::Role Sat Apr 24 2021 05:03:07 GMT+0000 (Coordinated Universal Time) ⠦ Initializing project in the cloud... CREATE_COMPLETE DeploymentBucket AWS::S3::Bucket Sat Apr 24 2021 05:03:16 GMT+0000 (Coordinated Universal Time) CREATE_COMPLETE amplify-reactamplified-dev-50248 AWS::CloudFormation::Stack Sat Apr 24 2021 05:03:18 GMT+0000 (Coordinated Universal Time) ✔ Successfully created initial AWS cloud resources for deployments. ✔ Initialized provider successfully. Initialized your environment successfully. Your project has been successfully initialized and connected to the cloud! Some next steps: "amplify status" will show you what you've added already and if it's locally configured or deployed "amplify add <category>" will allow you to add features like user login or a backend API "amplify push" will build all your local backend resources and provision it in the cloud "amplify console" to open the Amplify Console and view your project status "amplify publish" will build all your local backend and frontend resources (if you have hosting category added) and provision it in the cloud Pro tip: Try "amplify add api" to create a backend API and then "amplify publish" to deploy everything |
そして次に、Reactフロントエンド用UIライブラリをインストールしました。
|
1 2 |
$ npm install aws-amplify @aws-amplify/ui-react |
できたindex.jsにGithubに用意された3行を足して次のようにしました。
|
1 2 3 4 5 6 7 8 9 10 11 12 13 14 15 16 17 18 19 20 21 22 |
import React from 'react'; import ReactDOM from 'react-dom'; import './index.css'; import App from './App'; import reportWebVitals from './reportWebVitals'; import Amplify from "aws-amplify"; import awsExports from "./aws-exports"; Amplify.configure(awsExports); ReactDOM.render( <React.StrictMode> <App /> </React.StrictMode>, document.getElementById('root') ); // If you want to start measuring performance in your app, pass a function // to log results (for example: reportWebVitals(console.log)) // or send to an analytics endpoint. Learn more: https://bit.ly/CRA-vitals reportWebVitals(); |
APIのデプロイ
|
1 2 3 4 5 6 7 8 9 10 11 12 13 14 15 16 17 18 19 20 21 22 23 24 25 26 |
$ amplify add api ? Please select from one of the below mentioned services: GraphQL ? Provide API name: myapi ? Choose the default authorization type for the API API key ? Enter a description for the API key: cmplify-cli-user ? After how many days from now the API key should expire (1-365): 7 ? Do you want to configure advanced settings for the GraphQL API No, I am done. ? Do you have an annotated GraphQL schema? No ? Choose a schema template: Single object with fields (e.g., “Todo” with ID, name, description) The following types do not have '@auth' enabled. Consider using @auth with @model - Todo Learn more about @auth here: https://docs.amplify.aws/cli/graphql-transformer/auth GraphQL schema compiled successfully. Edit your schema at /home/ec2-user/react-amplified/amplify/backend/api/myapi/schema.graphql or place .graphql files in a directory at /home/ec2-user/react-amplified/amplify/backend/api/myapi/schema ? Do you want to edit the schema now? Yes ? Choose your default editor: Vim (via Terminal, Mac OS only) Successfully added resource myapi locally Some next steps: "amplify push" will build all your local backend resources and provision it in the cloud "amplify publish" will build all your local backend and frontend resources (if you have hosting category added) and provision it in the cloud |
そしてpush
|
1 2 |
$ amplify push |
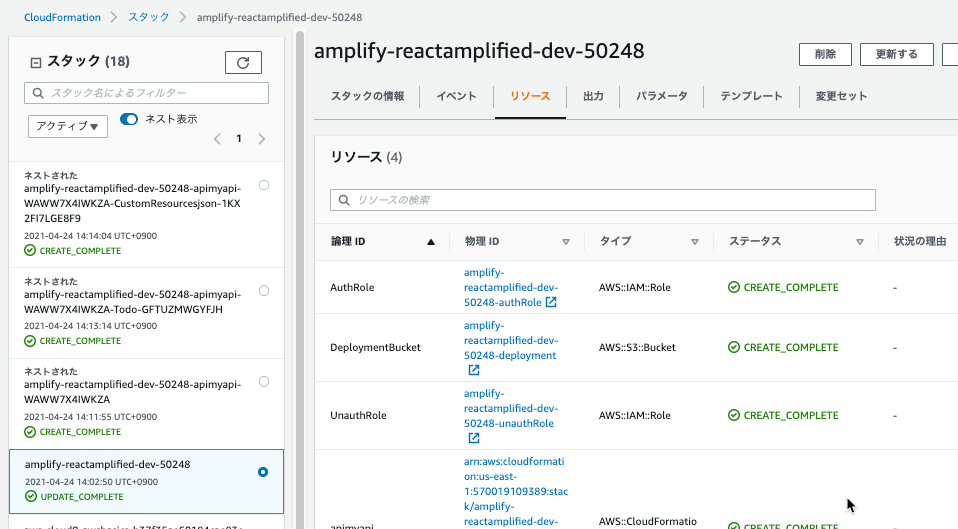
3つのネストされたCloudFormationスタックを作成する、CloudFormationスタックが作成されました。
アプリケーションの開発
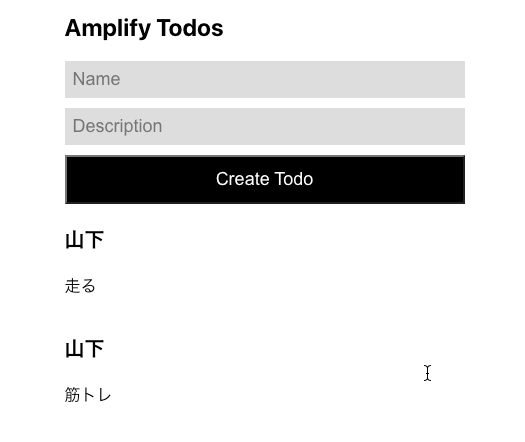
App.jsをGithubで用意されたソースに変更しました。
Todoアプリのようです。
npm startをやり直すと、、、、、、、、

Todoアプリが右下のウインドウで表示されました!
適当にNameとDescriptionを書いて[Create Todo]しました。
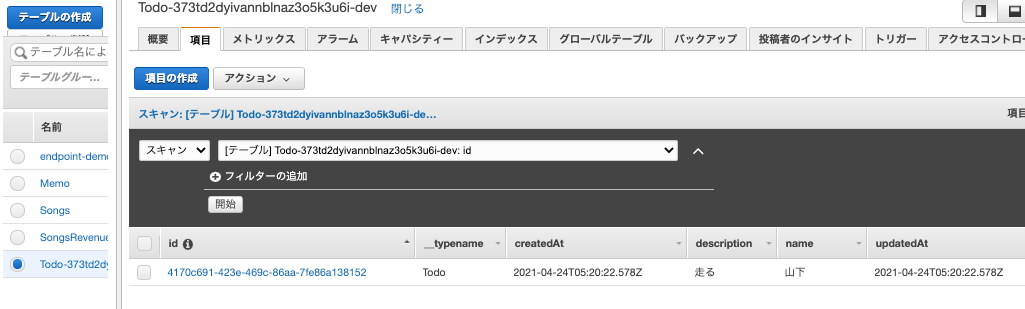
DynamoDBテーブルにPutItemされました!
Cloud9上でのローカルテストはOKですね。
アプリをAmplify環境へのホスティング
|
1 2 3 4 5 6 7 8 9 10 |
$ amplify add hosting ? Select the plugin module to execute Hosting with Amplify Console (Managed hosting with custom domains, Continuous deployment) ? Choose a type Manual deployment You can now publish your app using the following command: Command: amplify publish $ amplify publish ~省略~ |
CloudFormationスタックが更新されてアプリがデプロイされした。
アプリが起動できたので、テストデータを登録します。
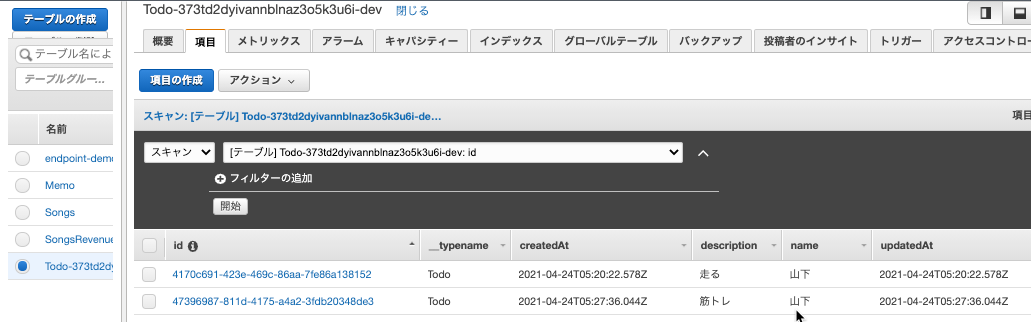
DynamoDBテーブルにPutItemできました。
Admin UIの起動
いよいよ本日の本編Admin UIの起動です。
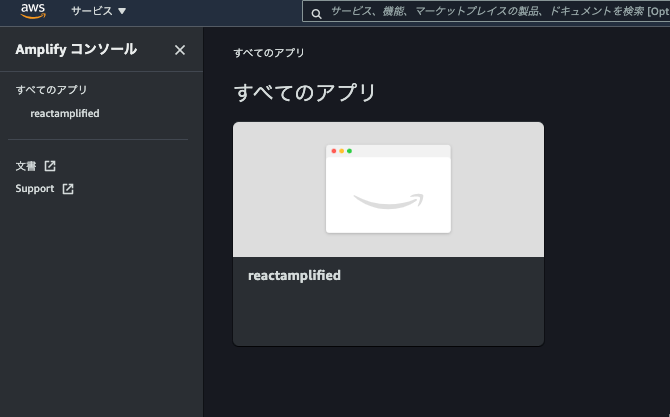
Amplifyコンソールにアプリが追加されています。
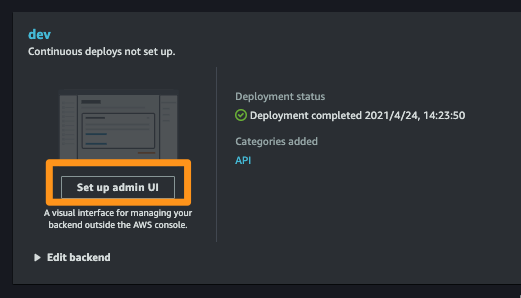
[Set up admin UI]を押下しました。
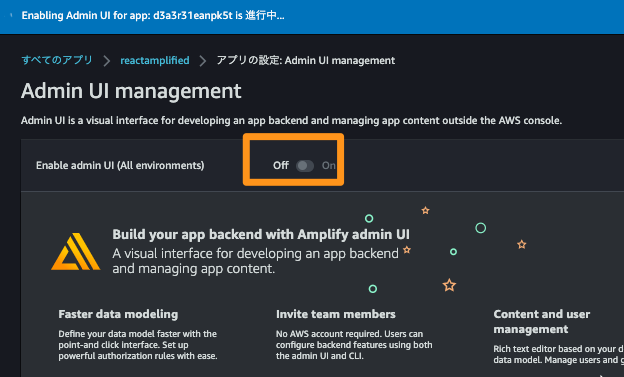
Enableをonにすると、有効化がはじまりました。
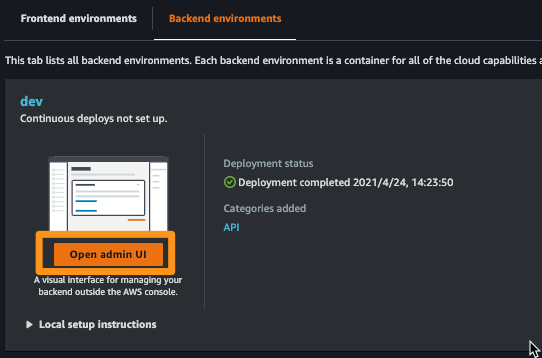
有効化が完了したので、[Open admin UI]を押下しました。
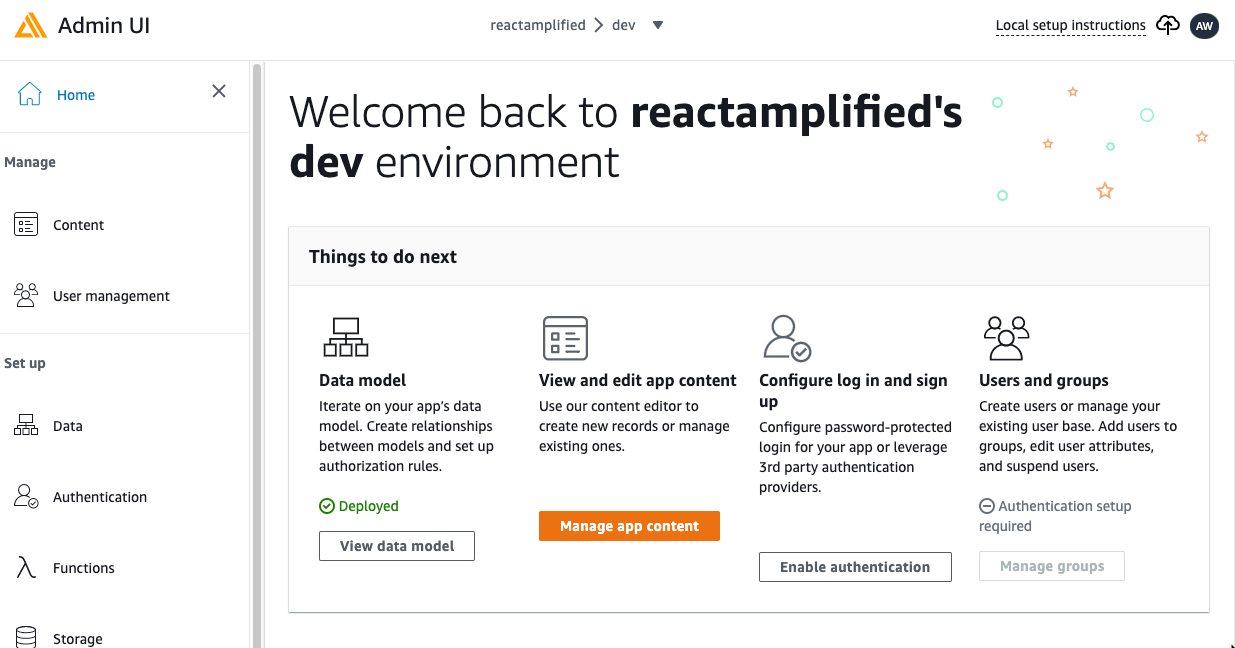
アプリの管理画面Admin UIにアクセスできました。
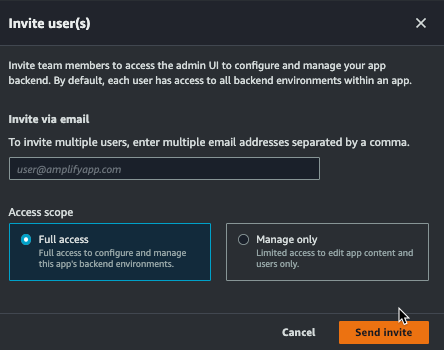
IAMユーザーとは別にAdmi UIのユーザーを招待して、アプリの管理をしてもらえます!
Hi!
You are invited to collaborate on the reactamplified (d3a3r31eanpk5t) project on AWS Amplify.
Your temporary credentials are:
Username:xxxxxx@gmail.com
Temporary Password: 4s9|ZGU8
Visit the Amplify admin UI to get started!
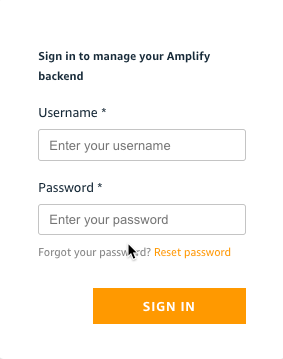
こんなメールが届いて、Admin UIへのログイン画面へアクセスできます。
一時パスワードでログインですね。
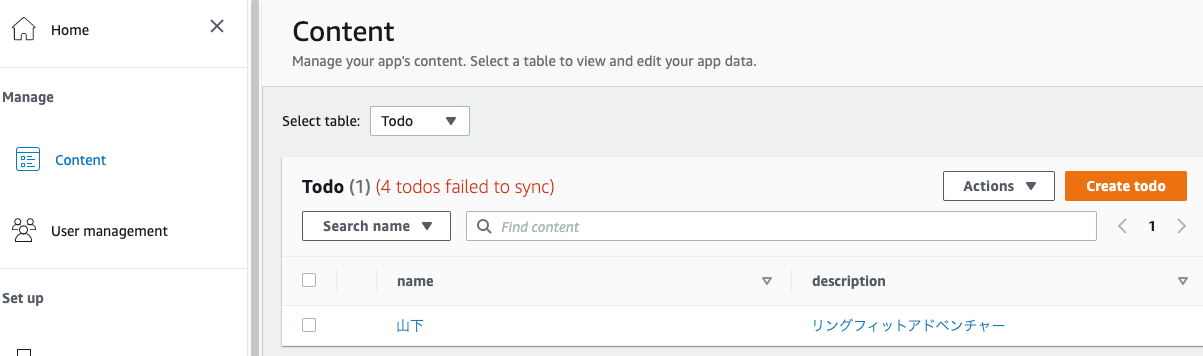
アプリで使っているDynamoDBテーブルのデータを管理したりできます。
マネジメントコンソールからDynamoDBテーブルをメンテナンスするのではなく、アプリの管理者としてデータメンテナンスができるのですね。
なるほど。
例えば商品マスタのメンテナンスとかですね。
Admin UIからアプリを作成するってこともできたりするそうです。
片付け
CloudFormationスタック削除とCloud9の環境削除です。
亀田さん、勉強会の開催ありがとうございました!
最後までお読みいただきましてありがとうございました!
「AWS認定資格試験テキスト&問題集 AWS認定ソリューションアーキテクト - プロフェッショナル 改訂第2版」という本を書きました。
「AWS認定資格試験テキスト AWS認定クラウドプラクティショナー 改訂第3版」という本を書きました。
「AWS認定資格試験テキスト AWS認定AIプラクティショナー」という本を書きました。
「ポケットスタディ AWS認定 デベロッパーアソシエイト [DVA-C02対応] 」という本を書きました。

「要点整理から攻略するAWS認定ソリューションアーキテクト-アソシエイト」という本を書きました。
「AWSではじめるLinux入門ガイド」という本を書きました。

開発ベンダー5年、ユーザ企業システム部門通算9年、ITインストラクター5年目でプロトタイプビルダーもやりだしたSoftware Engineerです。
質問はコメントかSNSなどからお気軽にどうぞ。
出来る限りなるべく答えます。
このブログの内容/発言の一切は個人の見解であり、所属する組織とは関係ありません。
このブログは経験したことなどの共有を目的としており、手順や結果などを保証するものではありません。
ご参考にされる際は、読者様自身のご判断にてご対応をお願いいたします。
また、勉強会やイベントのレポートは自分が気になったことをメモしたり、聞いて思ったことを書いていますので、登壇者の意見や発表内容ではありません。
関連記事
-

-
Developers Summit 2018 「NRIの働き方改革 – 開発スタイルから文化まで変えた軌跡 -」を聞きました
以下は、思ったことや気になったことをメモしていますので、必ずしも登壇者の発表内容 …
-
-
IPython Notebookで梅田のラーメン屋さんの統計情報を抽出するというハンズオンに行ってきました
IPython Notebookで梅田のラーメン屋さんの情報をWebスクレイピン …
-
-
「CXを推進するカスタマーサポート最前線<関西編>」に行きました
ウフルさん主催の「CXを推進するカスタマーサポート最前線<関西編>」に行ってきま …
-
-
東大阪メーカーズ・ミートアップ Vol.2に行ってきました
今回初参加で行ってきました。 東大阪メーカーズ・ミートアップとは 「主に東大阪の …
-
-
「JAWS-UG千葉支部オンライン#9 AWS re:Invent 2020 re:Cap&LT大会」に参加しました
今日は千葉支部におじゃましました。 re:Invent2020振り返り 〜はじめ …
-
-
「JAWS-UG大阪 第18回勉強会 サーバーレス」の運営をしました
JAWS-UG大阪 第18回勉強会 サーバーレスを開催、運営しました〜。 事の発 …
-
-
「Serverless Days Tokyo 2023 Keynote」を見ました
2023/9/23にServerless Days Tokyo 2023に参加し …
-
-
「INEVITABLE ja night #7 コネクティッド社会に向けた不可避な流れ」で課題を持ち続けることの大切さを再認識した
INEVITABLE ja nightに参加しました。 今回特に思ったことは、 …
-
-
「JAWS-UG KANSAI meetup Jan 2021」に参加しました
ようやくタイミングがあって、hopinに移行してから初の参加。 「今どんくらい人 …
-
-
「第1回 ぶろぐの勉強会」を開催します!
このブログは2021/3/2開催の「第1回 ぶろぐの勉強会」冒頭挨拶の共有資料代 …